이상탐지 개념을 소개해놓은 곳은 많은데 그래서 실제로 이미지를 가지고 어떻게 이상탐지하는지 토튜리얼을 올려놓은 곳은 찾기 힘들었다. 해외 포스팅 보고 따라해보았다.
Intro to anomaly detection with OpenCV, Computer Vision, and scikit-learn - PyImageSearch
In this tutorial, you will learn how to perform anomaly/novelty detection in image datasets using OpenCV, Computer Vision, and the scikit-learn machine learning library.
pyimagesearch.com
기반 논문은 Isolation Forest라는 논문이다. 의사결정 트리를 통해 정상 비정상을 구분한다고 한다.
일단 감잡으려고 토튜리얼 하는거니 궁금하면 나중에 찾아봐야겠다.
https://cs.nju.edu.cn/zhouzh/zhouzh.files/publication/tkdd11.pdf
폴더 구조
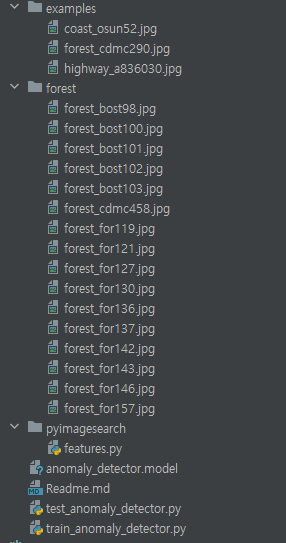
anomaly_detector.model은 나중에 훈련하면 생성되기 때문에 지금 없는게 당연하다.
패키지 설치하기
pip install numpy
pip install opencv-contrib-python
pip install imutils
pip install scikit-learn
데이터셋 다운받기
이 인간이 지꺼 유료구독하라고 데이터셋 링크는 치사하게 숨겨놨다. 구독할까 한 3초 고민하다가 구글링해서 데이터셋 찾았다.
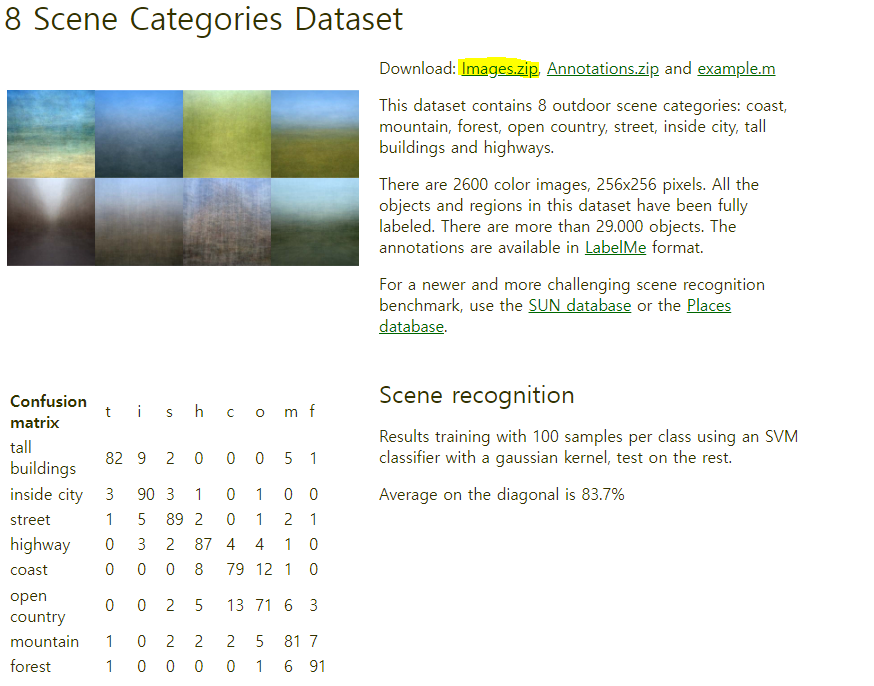
https://people.csail.mit.edu/torralba/code/spatialenvelope
Spatial envelope
Abstract: In this paper, we propose a computational model of the recognition of real world scenes that bypasses the segmentation and the processing of individual objects or regions. The procedure is based on a very low dimensional representation of the sce
people.csail.mit.edu
이 인간이 올린 폴더 구조를 보고 하나하나 이미지를 찾아서 옮겨도 되지만 수고를 덜기 위해 파일을 올려둔다.
훈련 하기
train_anomaly_detector.py
from pyimagesearch.features import quantify_image
import argparse
import pickle
import cv2

# 명령행 인수를 파싱
ap = argparse.ArgumentParser()
ap.add_argument('-m', "--model", required=True, help="path to pre-trained anomaly detection model")
ap.add_argument("-i", "--image", required=True, help="path to input image")
args = vars(ap.parse_args())

# 모델을 로드
print("[INFO] loading anomaly detection model...")
model = pickle.loads(open(args["model"], "rb").read())

# 입력 이미지를 로드하여 HSV 색상 공간으로 변환
image = cv2.imread(args["image"])
hsv = cv2.cvtColor(image, cv2.COLOR_BGR2HSV)
features = quantify_image(hsv, bins=(3, 3, 3))

# 모델을 사용하여 예측
preds = model.predict([features])[0]
label = "anomaly" if preds == -1 else "normal"
color = (0, 0, 255) if preds == -1 else (0, 255, 0)

# 예측 결과 텍스트를 이미지에 표시
cv2.putText(image, label, (10, 25), cv2.FONT_HERSHEY_SIMPLEX, 0.7, color, 2)

cv2.imshow("Output", image)
cv2.waitKey(0)
훈련 명령어
python train_anomaly_detector.py --dataset forest --m anomaly_detector.model
테스트하기
test_anomaly_detector.py
from pyimagesearch.features import quantify_image
import argparse
import pickle
import cv2

# 명령행 인수를 파싱
ap = argparse.ArgumentParser()
ap.add_argument('-m', "--model", required=True, help="path to pre-trained anomaly detection model")
ap.add_argument("-i", "--image", required=True, help="path to input image")
args = vars(ap.parse_args())

# 모델을 로드
print("[INFO] loading anomaly detection model...")
model = pickle.loads(open(args["model"], "rb").read())

# 입력 이미지를 로드하여 HSV 색상 공간으로 변환
image = cv2.imread(args["image"])
hsv = cv2.cvtColor(image, cv2.COLOR_BGR2HSV)
features = quantify_image(hsv, bins=(3, 3, 3))

# 모델을 사용하여 예측
preds = model.predict([features])[0]
label = "anomaly" if preds == -1 else "normal"
color = (0, 0, 255) if preds == -1 else (0, 255, 0)

# 예측 결과 텍스트를 이미지에 표시
cv2.putText(image, label, (10, 25), cv2.FONT_HERSHEY_SIMPLEX, 0.7, color, 2)

cv2.imshow("Output", image)
cv2.waitKey(0)
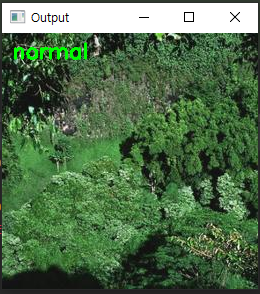
테스트 명령어
python test_anomaly_detector.py --model anomaly_detector.model --image examples/forest_cd
mc290.jpg
결과


전체 코드
https://github.com/sangeun-jo/novelty_detection_tutorial.git
GitHub - sangeun-jo/novelty_detection_tutorial: Novelty detection 이미지 이상탐지 예제
Novelty detection 이미지 이상탐지 예제. Contribute to sangeun-jo/novelty_detection_tutorial development by creating an account on GitHub.
github.com
'AI' 카테고리의 다른 글
| [이미지전처리] 외곽선 검출 알고리즘 논문 리뷰 (0) | 2024.05.23 |
|---|---|
| [colab] yolov6 커스텀 데이터 셋으로 훈련시키기 (2) | 2023.07.21 |
| yolov6 토튜리얼 따라하기 (1) | 2023.07.17 |
| [CNN] 개 고양이 분류 모델 만들기 (1) | 2023.07.17 |


